Showing posts with label SUMMER. Show all posts

Saturday, May 31, 2014

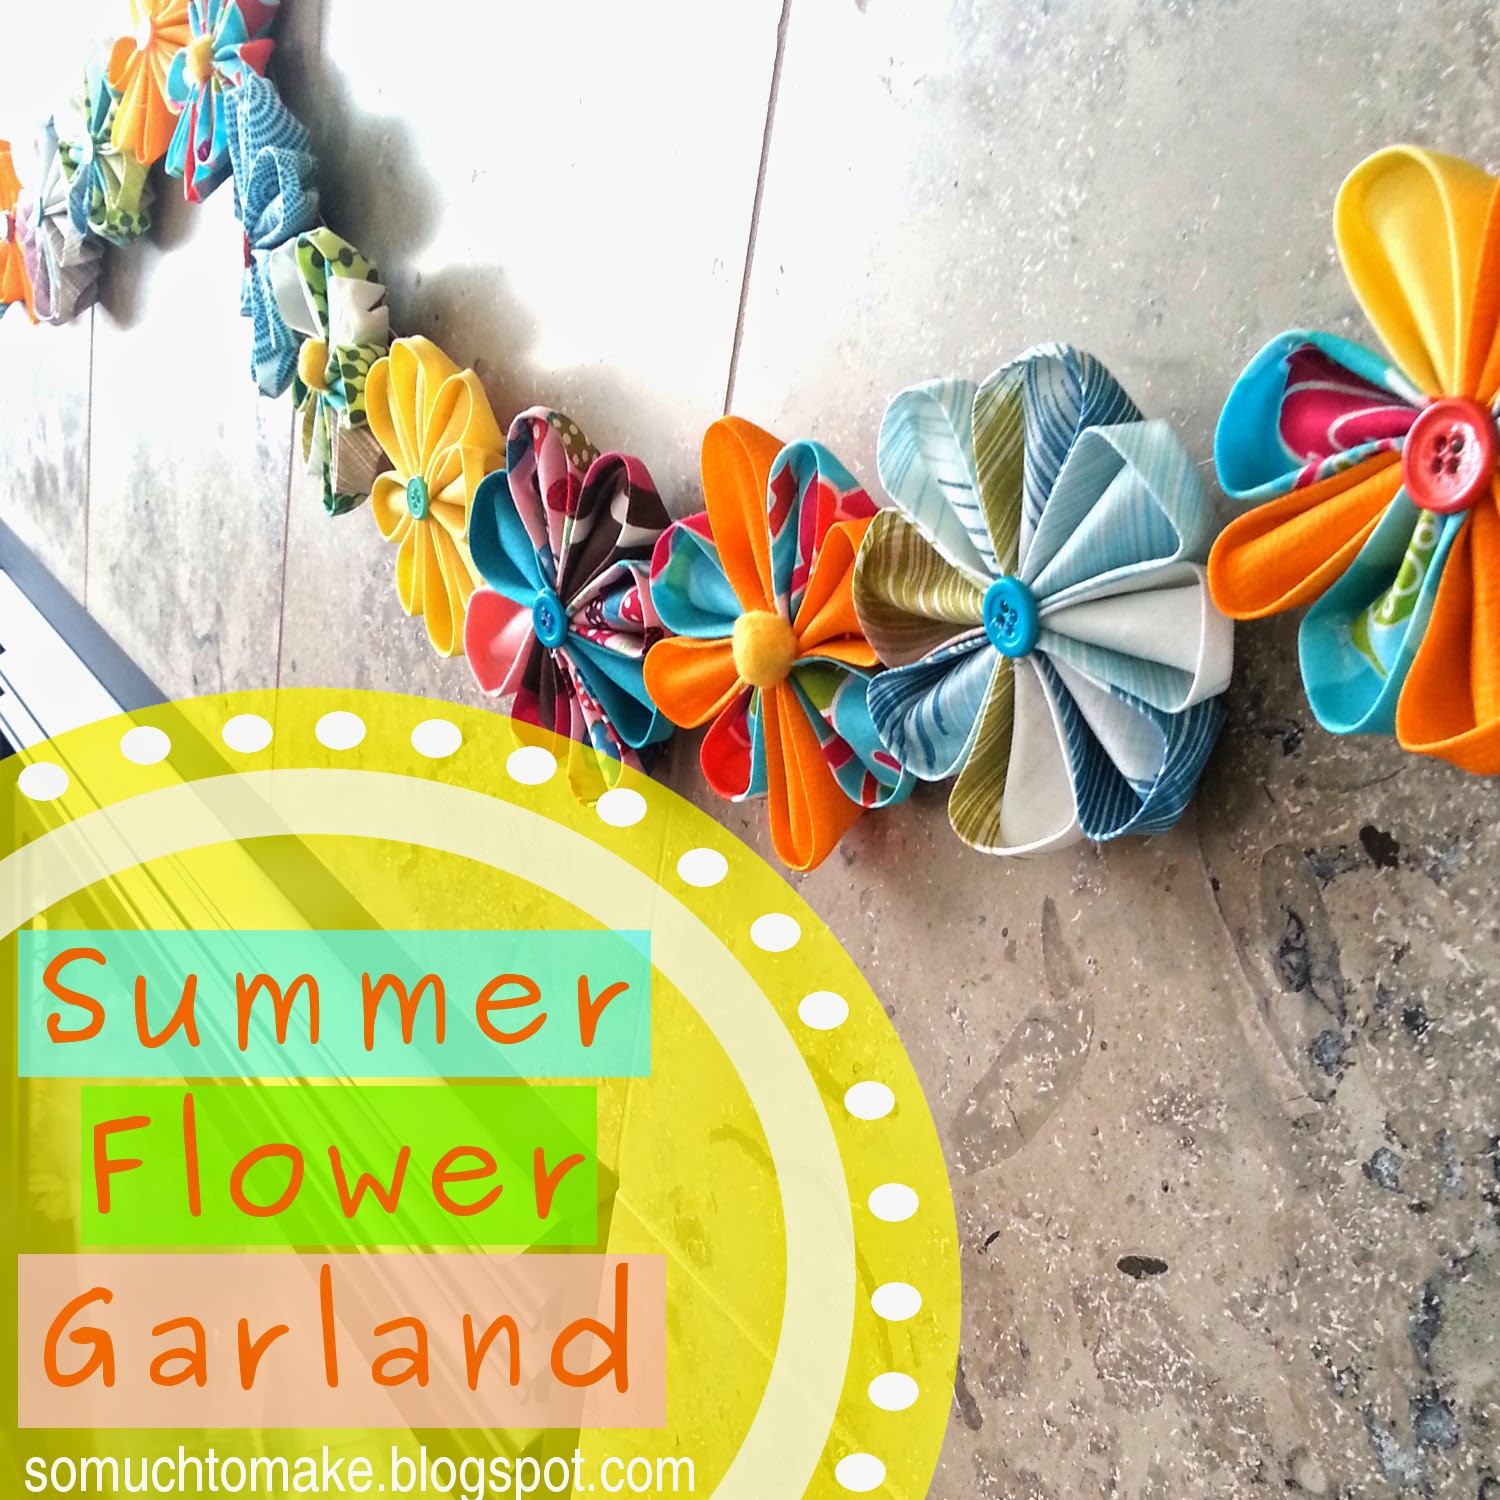
Summer Flower Garland


Okay, who's a fabric hoarder?  Go ahead--fess up. :) You are in good company, I assure you.

Good news!! I have a CURE for your problem. It is this fun and festive fabric flower garland! It is easy to make, and you can use up a bunch of those fabric remnants you've been hanging on to!

I found an EXCELLENT tutorial on how to make the flowers from Rox's World of Quilts.  She shows how to make two variations of this flower--I stuck with the second one for this garland. They are seriously simple. Once you make one, you will have the process down for the rest.

For measurement reference (so you know how many you can make with the fabric you have), each 1/4 yard of fabric makes 20 petals.  Each flower has 8 petals. Hopefully that helps!

Here are my flowers all made. I used hot glue to attach buttons or pom-poms to the front and a small piece of felt to the back.

Next,  line them all up in the order you want them to be in for the garland. 

Using heavy button thread (embroidery thread would work, too), sew through the back of  a couple of petal walls to string them up.  Push them along on the thread to arrange them as you'd like.

I love the change bright colors make on my drab fireplace!


This post is partying at: 
Yesterfood

Catch a Glimpse Button

Put A Bird On It

Tatertots and Jello
 
Say G'Day Saturday

Mandy's Recipe Box
My Pinterventures

Sarah Celebrates
Pint Sized Baker

Wednesday, May 21, 2014

Key Lime Pie Bars


I love a good Key lime pie.  A good one.

But, alas, not all Key lime pies are good. I have had Key lime pies that are WAY too sweet, ones that leave a weird--almost bitter--aftertaste, and ones that have a decent texture, but hardly taste of the unique, fresh taste of Key limes at all.

Eight little Key limes appeared in my Bountiful Baskets (produce co-op) order this week, so I was compelled to come up with a way to use them. I decided I wanted to make a bar instead of a pie, and I wanted to bring coconut into the picture somehow, because lime and coconut are a match made in heaven. (Have you ever had a dirty Diet Coke??)

So I studied up on some of my recipes, and came up with a plan. And it turned out to be a good one!

I was especially excited about the filling. It isn't made from cream cheese (like many similar bars), so it doesn't have that cheesecake taste that can sometimes overwhelm citrus flavors. It is made from (drumroll...) cottage cheese!

STOP--don't leave this page. I PROMISE it is delicious. SOOOO delicious. My family gobbled it up. It bears no resemblance to cottage cheese whatsoever when the bars are complete. But, the mild taste of cottage cheese is such a better medium for carrying the tart, rich Key lime flavor than cream cheese would be.

And we can't forget the crust. Buttery, but not crumbly. A hint of coconut and vanilla.  It is the perfect companion to this filling.

Enjoy!

Key Lime Pie Bars

Butter Coconut Crust:
1/3 cup butter, softened
1/4 cup light brown sugar
1 egg yolk (save white)
1 tsp vanilla
3/4 cup all-purpose flour
1/2 cup shredded coconut

Preheat oven to 350°. Mix butter, brown sugar, egg yolk, and vanilla until smooth.  Add flour and mix well. Stir in coconut.  Press into greased 8x8" baking dish. Bake 10 minutes. Cool.

Filling:
1 cup low-fat cottage cheese
1 cup sugar
2 tablespoons all-purpose flour
1 tablespoon grated Key lime rind
2 1/2 tablespoons fresh Key lime juice
1/4 teaspoon baking powder
1 large egg
1 large egg white

In a food processor, process cottage cheese 1-2 minutes, until smooth, scraping the bowl once. Add sugar and flour and process until incorporated. Add remaining ingredients and process until well blended.
Pour onto cooled crust.
Return to oven, and bake 30-35 minutes, until set. (Edges will be light brown)

Cool completely. Cover and refrigerate at least 3 hours before serving.


Catch a Glimpse Button

Put A Bird On It
Yesterfood


What's Cooking Love?
Weekend Recipe Link Up Party