Showing posts with label MAKE. Show all posts

Tuesday, March 29, 2016

Roman Shades: The Complete Tutorial

 I want you to have success making your Roman shades, and I hope this comprehensive tutorial gives you the full instructions you need. My goal here is one-stop-shopping for all your DIY Roman Shade from Mini-blind needs! 

The internet is thick with tutorials for making Roman shades. I have seen some that tie-up, some that use dowels and pockets, and some that, like mine, use mini-blinds.  I studied several before deciding to try the mini-blind method on fabric shades for my dining room. They were a success, but a learning process to complete.

Then, a couple of weeks ago, I helped a friend with a Roman shade for her kitchen. As we worked, I decided I would make another Roman shade for my kitchen, and document the process along the way in hopes of making a more thorough set of instructions than many we found. 
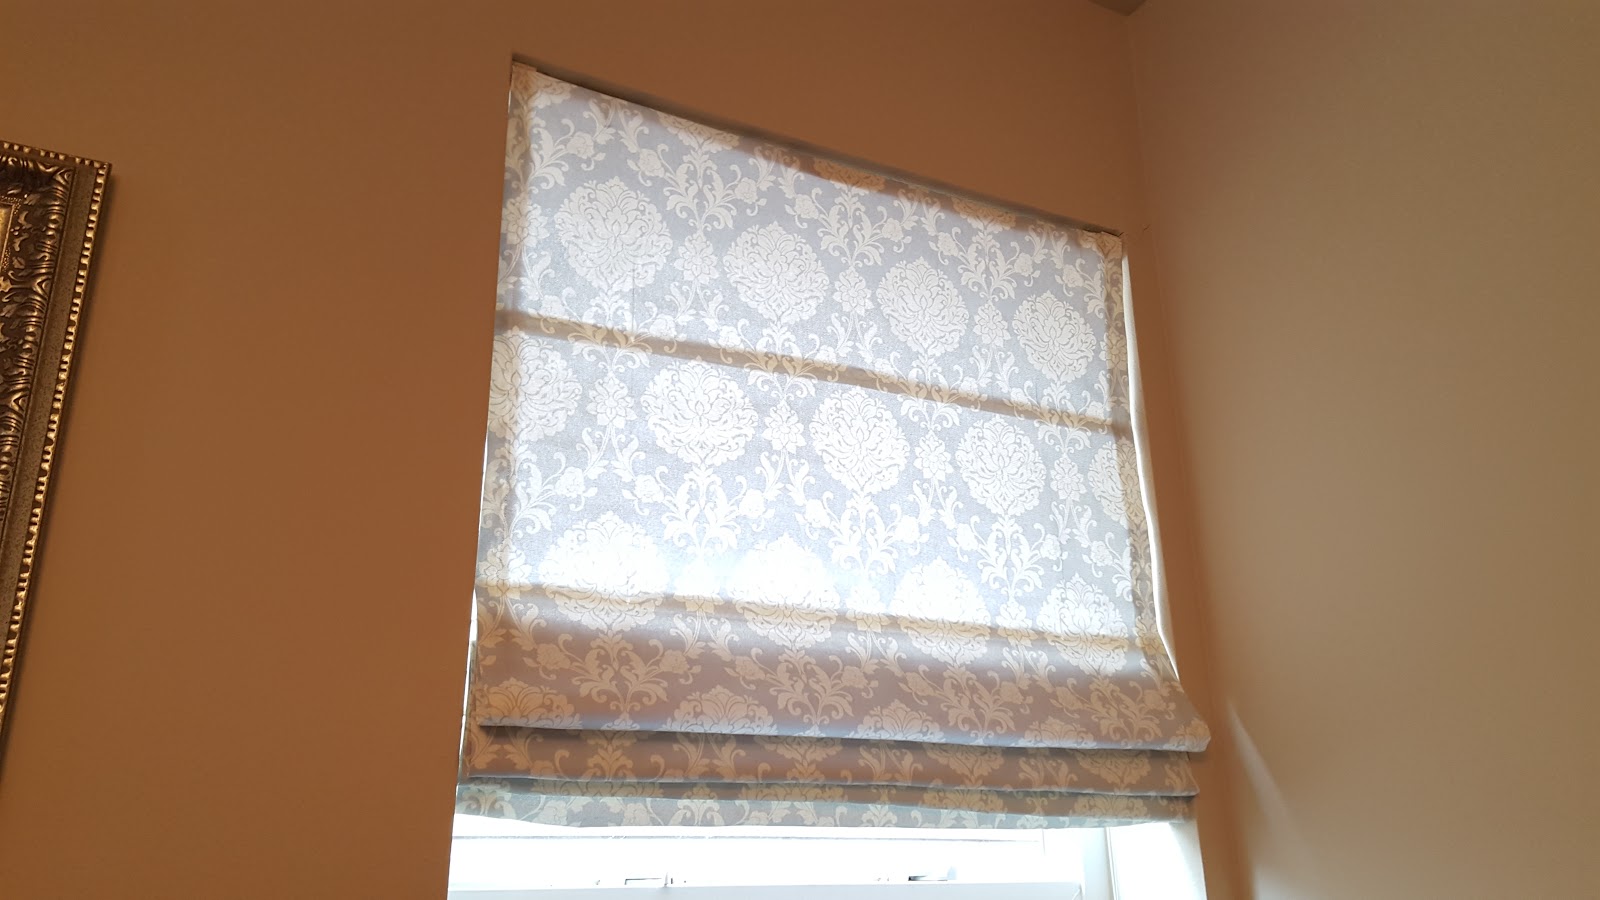
 Here is one of my dining room shades. I was happy with how they turned out, but the learning curve was a bit steep. The tutorials got me on the right path, but they also left some steps out.  I will try to address every step of the process for you.

No tutorial is complete without the "Before" picture. Clearly, my window needed dressing. We live a few feet from our neighbors (who we love, thankfully!), but I'm sure they don't want to see me washing dishes every time they glance in our direction!

How to Make Roman Shades with Mini Blinds

1. Measure. You will need to measure your window's height and width. You also need to decide if you want the shades to be hung inside the window frame, or above and outside the frame.  After doing both (my dining room shades are mounted inside the frame; the kitchen shade is outside), I prefer the look of the outside mount.

2. Choose fabric. Using those measurements, purchase fabric that is the dimensions of the window's area, plus at least 2 inches per dimension to allow for hemming.  Home decorator fabric is ideal for this because it is heavier than quilting cotton, but not as heavy as an upholstery. If the window gets an abundance of sun, consider a decorator fabric that is made to not fade in sunlight, like Waverly Sun 'n Shade.  I love Fabric.com, but you can also find good decorator fabrics at JoAnn's, Hobby Lobby, and even Walmart.

3. Purchase mini blinds. Using your measurements, choose a blind that is the width of the window plus 2-4 inches, if you are doing an outside mount; or choose a blind that is the width minus 1-2 inches if you are doing an inside-mount.  The height of the blinds doesn't have to be exact, but it needs to be at least as long as your window. They can't be too long, just too short. 


4. Gather supplies.  You will need:
  • Fabric (see #2 above)
  • Mini Blinds (see #3 above)
  • Good scissors (not pictured)
  • Needle nose pliers (not pictured)
  • Hemming tape and/or Sewing Machine and thread
  • Measuring tape, rulers, and/or yard stick
  • Hot glue gun + hot glue sticks

5. Prep your blinds for surgery.  When you remove your blinds from the box, they will look like this. Find the release cord and pull it out to the side to release the pulley so the blind can be spread out.

Here they are released and spread out to their full length.

6. Cut the ladder cords. On every blind, there are two kinds of cords: The Lift Cords and The Ladder Cords. The lift cords run through little holes in the blind slats and are attached to the pulley system to allow the blinds to go up and down. You need the lift cords, so do not cut them. The ladder cords hold the blind slats in place and allow the blinds to be tilted open or close to adjust the light that is filtered by the blinds. You do not need the ladder cords, so use scissors to cut them out.

I cut along the horizontal "rungs" of the ladder cord (as shown in the picture above), and then at the top and bottom to separate them from the top and base of the blinds.

After you have cut all the ladder cords, you can discard the mess of string you have collected.

Your blind slats will look like this, able move freely up and down the lift cords, once the ladder cords are removed.
7.Remove plugs to expose lift cords.  At the bottom of the blinds is a thicker, hollow base slat. On the bottom side of the base are plugs that hold the lift cords in place.

Pull the plugs out. You will see the lift cord inside with a knot in the end. Pull the knotted end out (you may need needle nose pliers for this).  If you have some ladder cord still stuck in there, it can be discarded.


8.Determine the number and size of folded sections you want in your Roman shade.  Sections look nice anywhere from 8" to 12" wide (this is the vertical width). My window is 52 inches high, but I planned an outside mount which would add a few inches, so I rounded up to 54 inches, which allowed me to plan for 6 folded sections, each 9 inches in vertical width.

9. Remove excess slats and size blinds. Remove slats by untying the lift cords and pulling the slats off the bottom. Leave 1 less blind slats than the number of sections/folds you will have in your blind.   If your Roman shade will have 6 sections, you should remove all but 5 slats, not counting the top and base. 

Size the length of the blinds by moving the base of the blinds up on the lift cord so the distance from the top to the base is the height you want your Roman shade to be. Make sure the cords are pulled straight, then tie them off evenly and stuff them back into the base holes.


Once the height is right, replace the base hole caps. I found that they stayed in place better if I left a little cord hanging out.

10. Remove the tilt rod hook. This part isn't hard, but it also isn't pretty. It is, however, necessary for your shades to lay nicely. The hook that sticks out at the top of the blinds for holding the rod that can be turned to tilt the blinds should be removed. Using needle nose pliers, firmly grip the plastic above the hook. Holding the top of the blinds still, twist and squeeze the small plastic cylinder to break it and release the hook.

11. Size and hem the fabric.  Measure the height and width of the blinds again (you can't be too careful). Add on the number of inches to each size that you want your hems to be.  I like the look of a thicker hem at the top, and smaller 1" hems along the sides and bottom, so I cut my fabric adding on to allow for those folds.
I used my sewing machine for some hems, and I also tried the iron on hemming tape. Both worked well, so it is really a matter of preference.

12. Line up the blinds on the fabric. This is where extra rulers and measuring tapes come in handy. Lay your hemmed fabric face-down on a large, flat workspace. A table is ideal, but your kitchen floor will work if need be. Lay the blinds, also face-down, on the fabric, lining up the top along the top, and the base along the base.

Move the slats along the lift cords so they are equal distance apart from each other. You may want to use chalk to mark their spots so you can easily re-place them if they move. 
**Remember as you are measuring, that the vertical width of the slats is part of your section width; so if each section is supposed to be 9 inches, you need to include the slat in that measurement. Don't just measure the distance between the slats. 

13. Use hot glue to bind the slats to the fabric.  This was the part of the process that was most surprising to me. The hot glue not only works, it works WELL at binding the slats to the fabric.

Begin by gluing the top of the blinds to the top of the fabric, making sure everything is super straight and even.  I was especially generous with the glue here since the top is heavier than the slats.

Next, lift small (6-8 inch) sections of slat and lay hot glue directly underneath. Then immediately press the slat in place.

Do not glue about 1/2 inch on either side of the lift cords. This needs to be left open so the cord can move freely.

This is a matter of preference/ need, but I found that my fabric could be 1/2 inch wider than the slats on each side and still operate effectively. This is helpful if you need or want your shades to be a bit wider than the blinds you bought.

Finish by gluing the bottom of the fabric to the edge of the base of the blinds, along the front, short side of the base piece.
On my first Roman shades, I glued the fabric to the bottom of the base, so the fabric was covering the little plugs. The shades still function fine, but when they are let all the way down, the edge is curled under. Gluing to the front of the base, even though it is a smaller surface area, allows the fabric to lay flat at the bottom.

14. Hang the shades. Use the hardware and directions that came with the blinds to hang your new shade. Be sure to use all the center braces possible, since the fabric may be heavier than the slats you removed.


You are done!!! To operate the shade, use the pull strings the same way you would raise and lower blinds.  Sometimes I have to manually smooth the folds a bit, but nothing major.  I have been super pleased with the finished product on all my homemade Roman shades!


Thursday, March 10, 2016

DIY Bubble Shorts from Old Jeans


Baggy jeans or pants can be cut off and altered into ADORABLE bubble shorts for girls. It is a quick and easy alteration, and I will walk you through every step. 

My daughter has a few pairs of hand-me-down pants that aren't the skinny style that is so "in" right now. They are in great shape, but definitely don't look up-to-date and fashionable. One pair was some well-made Hannah Anderson jeans that would likely be too short by the fall, so I decided they would make cute shorts if done right.

Here you get an idea of the way the jeans fit. 
(We had just bought her a new swim suit the day I did this, and she didn't want to change it for this pic, so I didn't push--we choose our battles, right?)

1. With chalk, draw off where you want the shorts to fall on her thigh. I made these a bit longer than some bubble shorts because the jeans are roomy enough in the waist that they may fit her for two summers!

2. Use a ruler or measuring tape to make sure your cut lines are equal distance from the pockets and along the inseam.

 3. Cut off the jean legs.

4. Take one of the cut off legs, and cut along one seam. Lay it out flat.

5. Measure around the thigh of the girl who will be wearing the shorts. Add 2 inches to that measurement. This will be the length of the strips you will cut. 
6.Cut 2 strips from the flattened leg piece that are 3 inches wide by the above length. 

 7. Iron the two strips in half along the length of the strips, wrong sides together. Then fold each piece inward along the length in quarters. These are the bands to give the bottom edge of the shorts a nice, finished look. It could be super cute to do a contrasting fabric here, if desired. 

 8. Sew a gathering stitch around the base of each shorts leg, 1/4 inch from the edge. Pull the bobbin thread to gather the legs to the desired width. I had my daughter try them on at this point to make sure I was leaving plenty of moving room. You could also take the thigh measurement from above (#5) and add 1 inch.

9. Beginning along the inseam, pin the bands around the unfinished edges of each leg, leaving 1/2 inch at each end.

 10. To hide the raw edges of the bands, tuck one end into the other, and turn the edges of the end on top under. Pin carefully in place. (Sewing tip: My non-industrial sewing machine managed this, but I had to proceed slowly, and I started with my machine's presser foot up.)

 11. Sew a top stitch along the top edge of the bands (about 1/8" down).  Sew a vertical top stitch down the closing seam on the inseam (shown in #10). 

And you are done! Instead of raggedy cut-offs, you have stylish, tailored bubble shorts!


Tuesday, March 1, 2016

Origami Butterfly Wreath


I am so ready to welcome Spring warmth and sunshine. Bring on bright colors and bright days! We have had the sun peek out a handful of times in the past week, and it gave me the itch to make this new, bright butterfly wreath.  

Origami butterflies are one of the most easy origami folds to do. Once you make a couple, you will have it down. I used origami paper, but any square-shaped, foldable paper will work. I found this excellent picture tutorial from Simple Joys. I also made a video tutorial to share here:


Once your butterflies are made (I made 18 of varied sizes), you will need:
  • 1 foam wreath form (I show how to make one from foam insulating tubing here).
  • Fabric, yarn or ribbon to wrap the wreath
  • Sewing pins (I had pearlized headed ones on hand, flat headed pins would be great)
  • Pom-pom trim, ribbon, or other embellishments, if desired

1. Wrap the foam wreath tightly in your desired textile and secure with a sewing pin. 
2. Arrange origami butterflies, securing them with hidden sewing pins (see pictures below).
3. Add other trim if desired, also using pins to secure.

So easy, right??

 Here you see where I pinned the butterflies to the wreath.

Pins are only visible from this angle because I want to show how I they are pinned. They are well-hidden looking at the wreath from the front.

 With the varieties of paper out there, the possibilities for creative color combinations and themes are endless! I'd love to see what you come up with!


Thursday, January 21, 2016

Kids' Hiking Gaiters Pattern


If you follow my blog or my social media feeds (or if you know me personally!), you know that I love spending time with my family, especially if we get to be out in nature!  You will also be very aware that I like to sew, especially when I get to use original creative thought in the process!

This Kids' Hiking Gaiters project has been a perfect marriage of my love of outdoor adventuring and creative sewing! 

WHY GAITERS? 
If the trail is muddy, dusty, rocky, wet, or snowy, gaiters are a hiker's best friend. They keep unwanted pebbles, dirt, ice, and anything else on the trail out of your boots. They add an extra layer of protection for your legs from thorns and scratchy underbrush.  No more frayed pants legs and scratched up shins! And if there is 2 feet of snow?? No problem!!

My husband and I have been working on fully outfitting our family for backpacking trips over the past 3 years. It has been a learning process that has taken time, research, money, and experience.  We have bought nice hiking gaiters for 4 of the 6 of us--the 4 who could wear adult-sized gaiters. However, child-sized gaiters are much harder to find. We wanted them to be as rugged as adult gaiters, but we needed them to fit our kids. So I told my husband I would design some.  I am SUPER excited about these. I used the pattern to make two pairs of gaiters for my kids, and it worked beautifully.

I designed these to be sewn using a standard home-use sewing machine. No industrial machine is needed. 

I have listed this pattern and tutorial, which includes a printable PDF of the pattern and an illustrated, step-by-step tutorial, on Etsy for an introductory price of $2.00 USD:


As an extra help for anyone making these, I am sharing here some places you can buy the materials to make these. Many standard fabric stores don't carry the sport utility fabrics required, but they can be found!

Here are some of my sources: 
  • FOR ONE-STOP SHOPPING: If you live in the Seattle area, Seattle Fabrics in Freemont is an excellent source for any and all the outdoor fabrics and sewing notions you will need.  I guess that is a bonus to having Outdoor Research and REI headquartered here. If you don't live here, no worries, Amazon (also headquartered here) ships everywhere and has many excellent outdoor fabric and notion deals.
  • PACK CLOTH :  Amazon has some great deals on this tough, water-resistant fabric. It is what your child's backpack is made of and makes excellent gaiters. (And my daughter would have LOVED that hot-pink option! Too bad I just found it!)


  • IRONING BOARD FABRIC:  I found this versatile fabric at Joann's. Although it contains cotton (which we generally avoid with outdoor gear), it has aluminum woven into the surface making it very tough and water resistant. It also won't melt if a hot ember lands on it (which can't be said of any of the nylon fabrics!).  In my gaiters pattern, I double up this fabric to give added stability to the gaiter. 
  • RIPSTOP NYLON:  Many fabric stores are starting to carry a limited supply of ripstop nylon. Not all ripstop is created equal. If you are wanting to use it for the main body of the gaiters, I suggested holding out to find a heavier, coated ripstop so it will be water resistant.  Amazon has some--but be sure to read the reviews; some say they are water resistant but do not have a polyurethane coating.  For the front panels of the gaiters, an uncoated ripstop would be fine. 


  • LADDER LOCK SLIDER BUCKLES and WEBBING: You might find these at your fabric store, but be careful of the quality.  You want webbing and buckles that can hold up to abuse since these will be right at the base of the boot. They will undoubtedly be scratched by rocks, get caked in dirt and mud, and get very wet.  Again, Amazon is a good source, but read reviews and go for the branded options.  Often REI and other outdoor outfitters will carry these where you buy rock climbing gear if you don't want to buy the large quantities offered on Amazon.

  • COAT HOOKS: These can be found at fabric stores. They will come as "Coat Hook and Eyes." You'll only need the hooks for this. You can also order them on Amazon.  Be sure to get them large enough to hook around a shoe lace (there are some tiny hook and eye sets out there). 

  • 1.5 INCH VELCRO: When designing these gaiters, I ALMOST went with a 3/4" Velcro. That was my original plan. Then as the design went forward, I realized that if I wanted my kids' gaiters to be as tough as the adults', they needed the fat, tough Velcro.  Call your fabric store before driving there to just buy this. It is not as in-demand as smaller width options and so isn't always carried. For me, it was cheaper to just order it than spend the gas to go searching. I bought this Country Brook Hook and Loop Velcro. It is EXCELLENT. No regrets on this purchase.


I snapped the photo above while making my kids' gaiters, testing out my original design. It was truly a rewarding process--knowing I was making something useful to my family, and that I could share for others to use.
If you get the pattern download, I'd love to hear about your experience making and using the gaiters! And of course, I love hearing about any family adventures on the trails!


Participating in some of these link-ups